Destruction Testing in The Garage
It’s a simple question. How strong are my welds? For a long time answering that question took shipping test coupons to a lab for destruction testing. It cost more than $200 a test at the time of this writing and can take a couple weeks! If only there was a cheaper faster way to test your welds. For most garage builders hiring out the welding is a common strategy. Race cars or any vehicle that needs a roll cage or custom tube chassis, also needs to be welded. And for safety reasons those welds are done by professionals that are certified at a high cost.
In this BLOG post we investigate destruction testing at home in the garage so you can self certify your welds! We found that it’s simple, easy, and cheap! Our whole setup cost about the same as one destruction test! Here is how we did it.
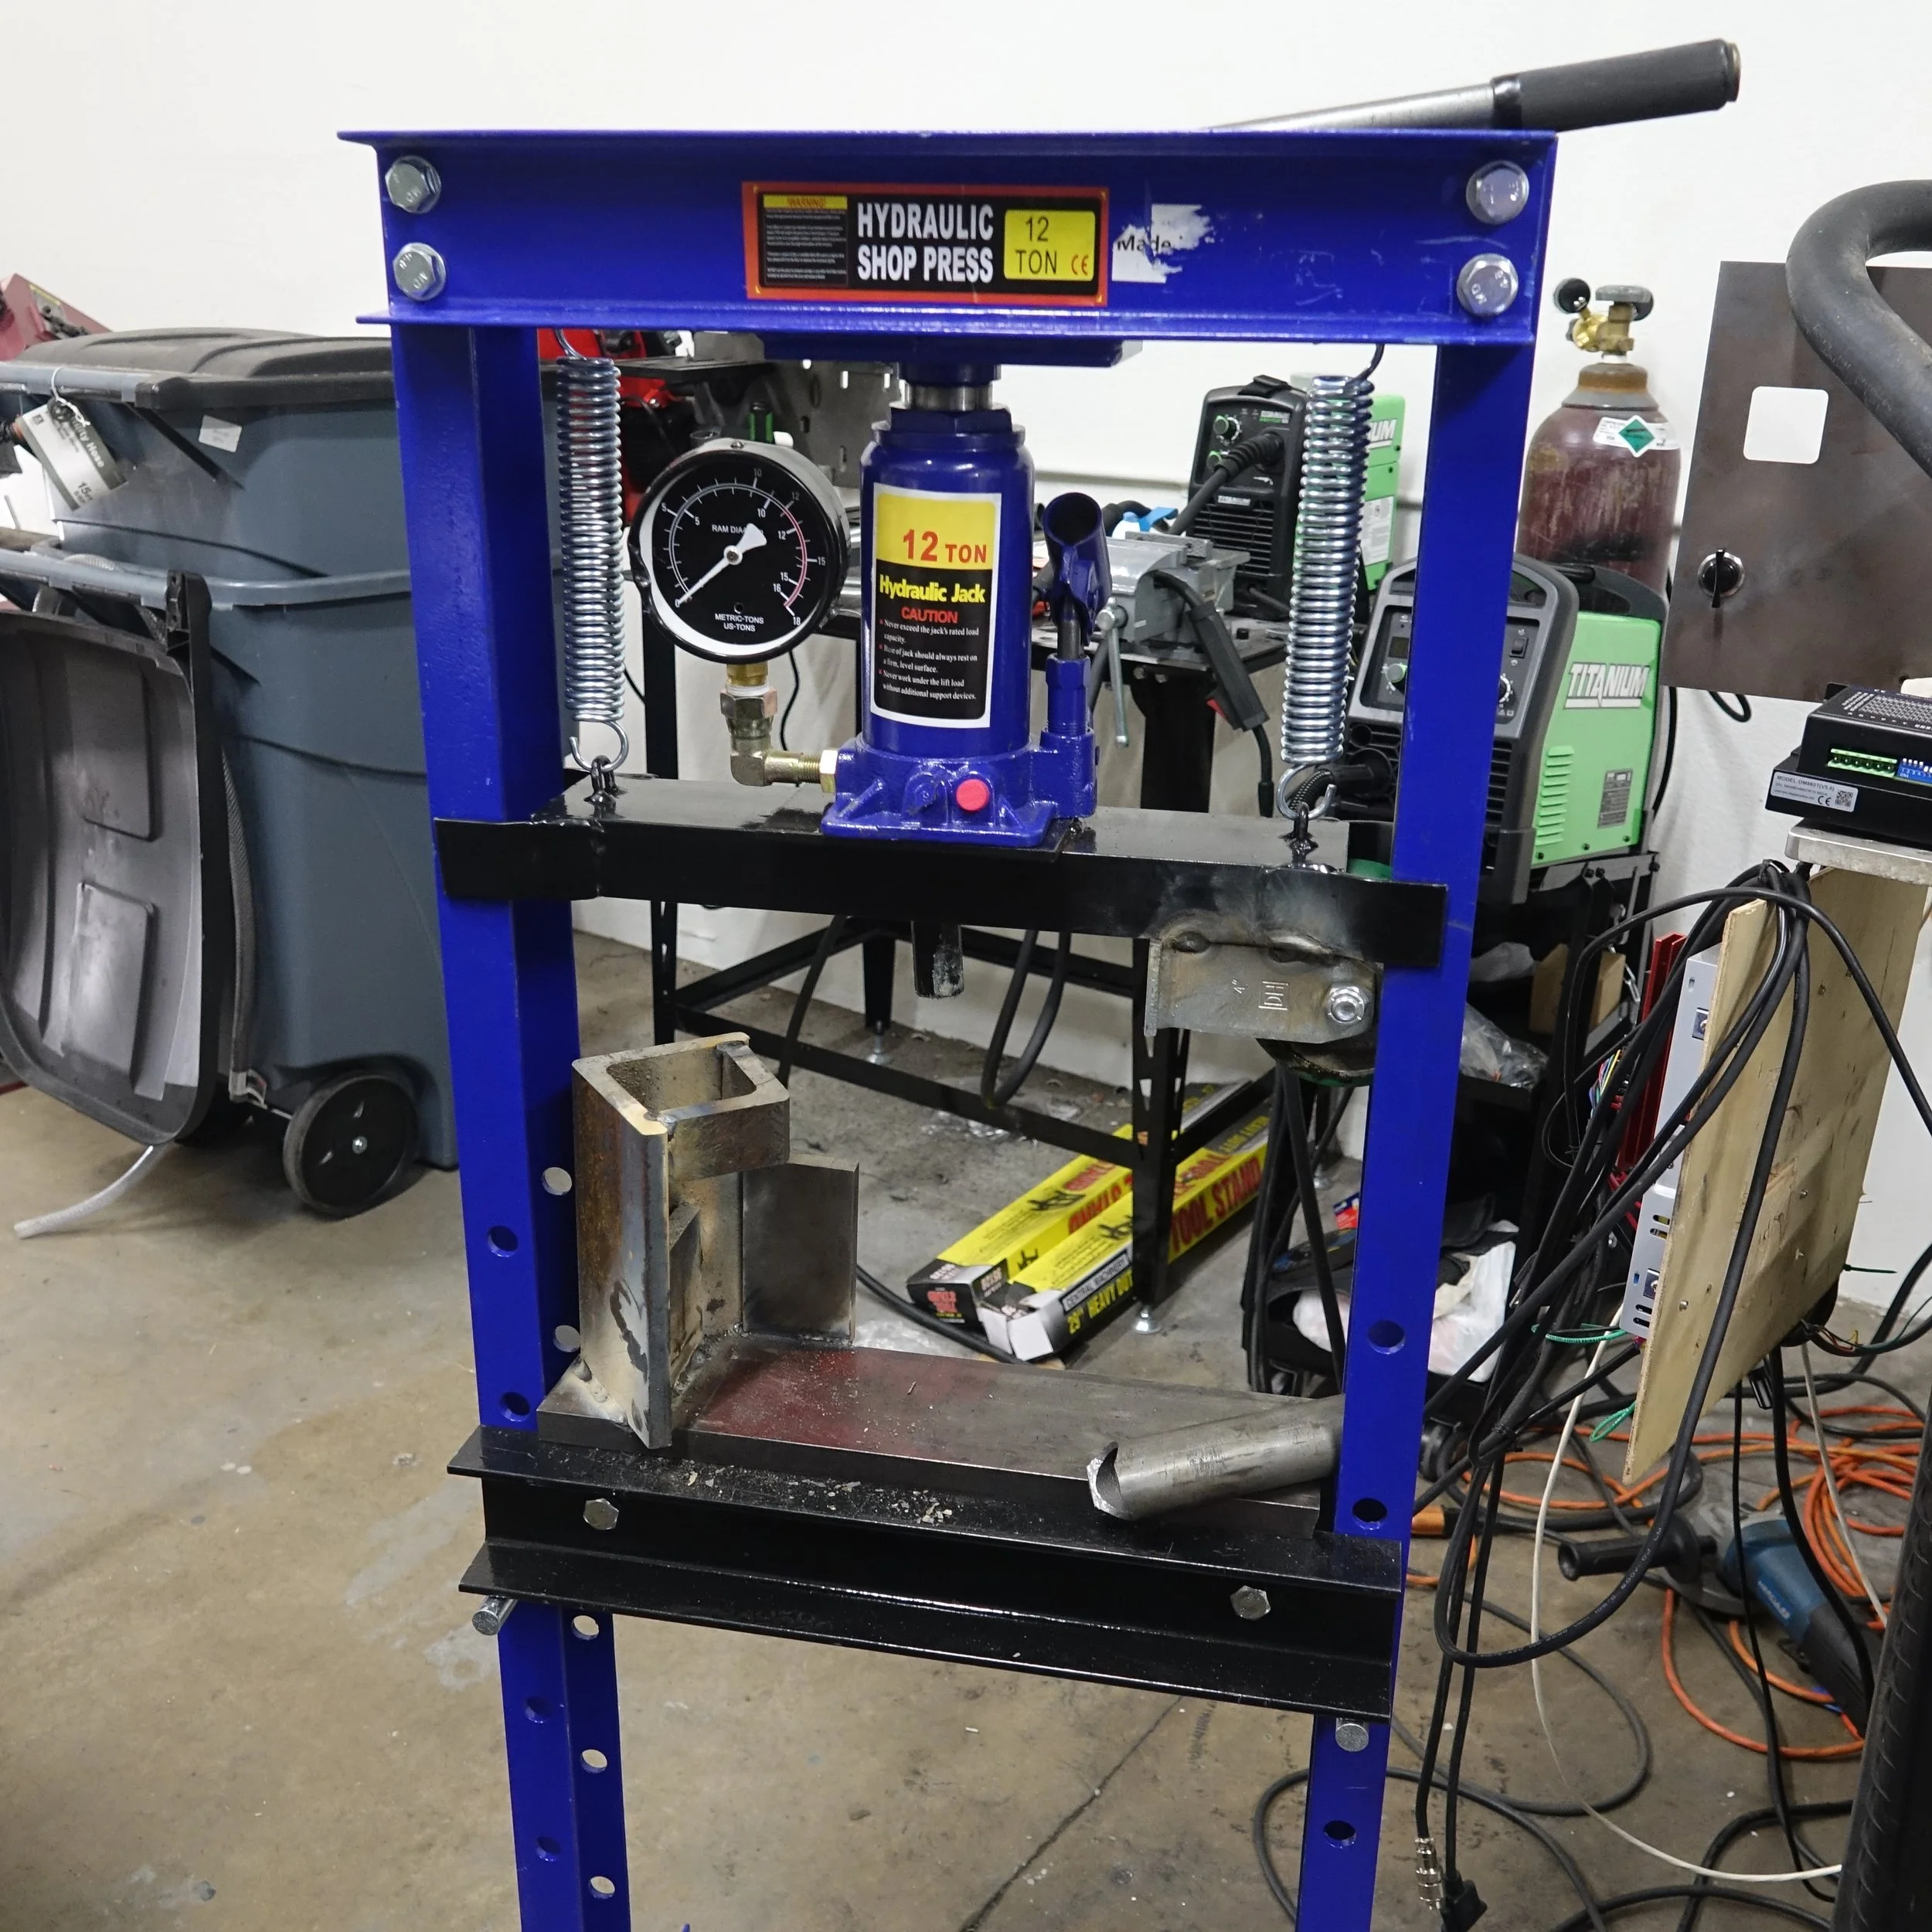
The first thing you need is a 12 ton press with a pressure gauge. This is the key to knowing how much force the test sample can take before it fails. Use you phone on a tri pod to record the test and play back the video so you can see at what force the weld coupon failed. We got our press from amazon for $180 in 2026. It came with a damaged gauge but lucky for us it was an easy fix. If you have a press already you can add a gauge. We didn’t do it that way so you are on your own if you want to convert your press to have a pressure gauge.
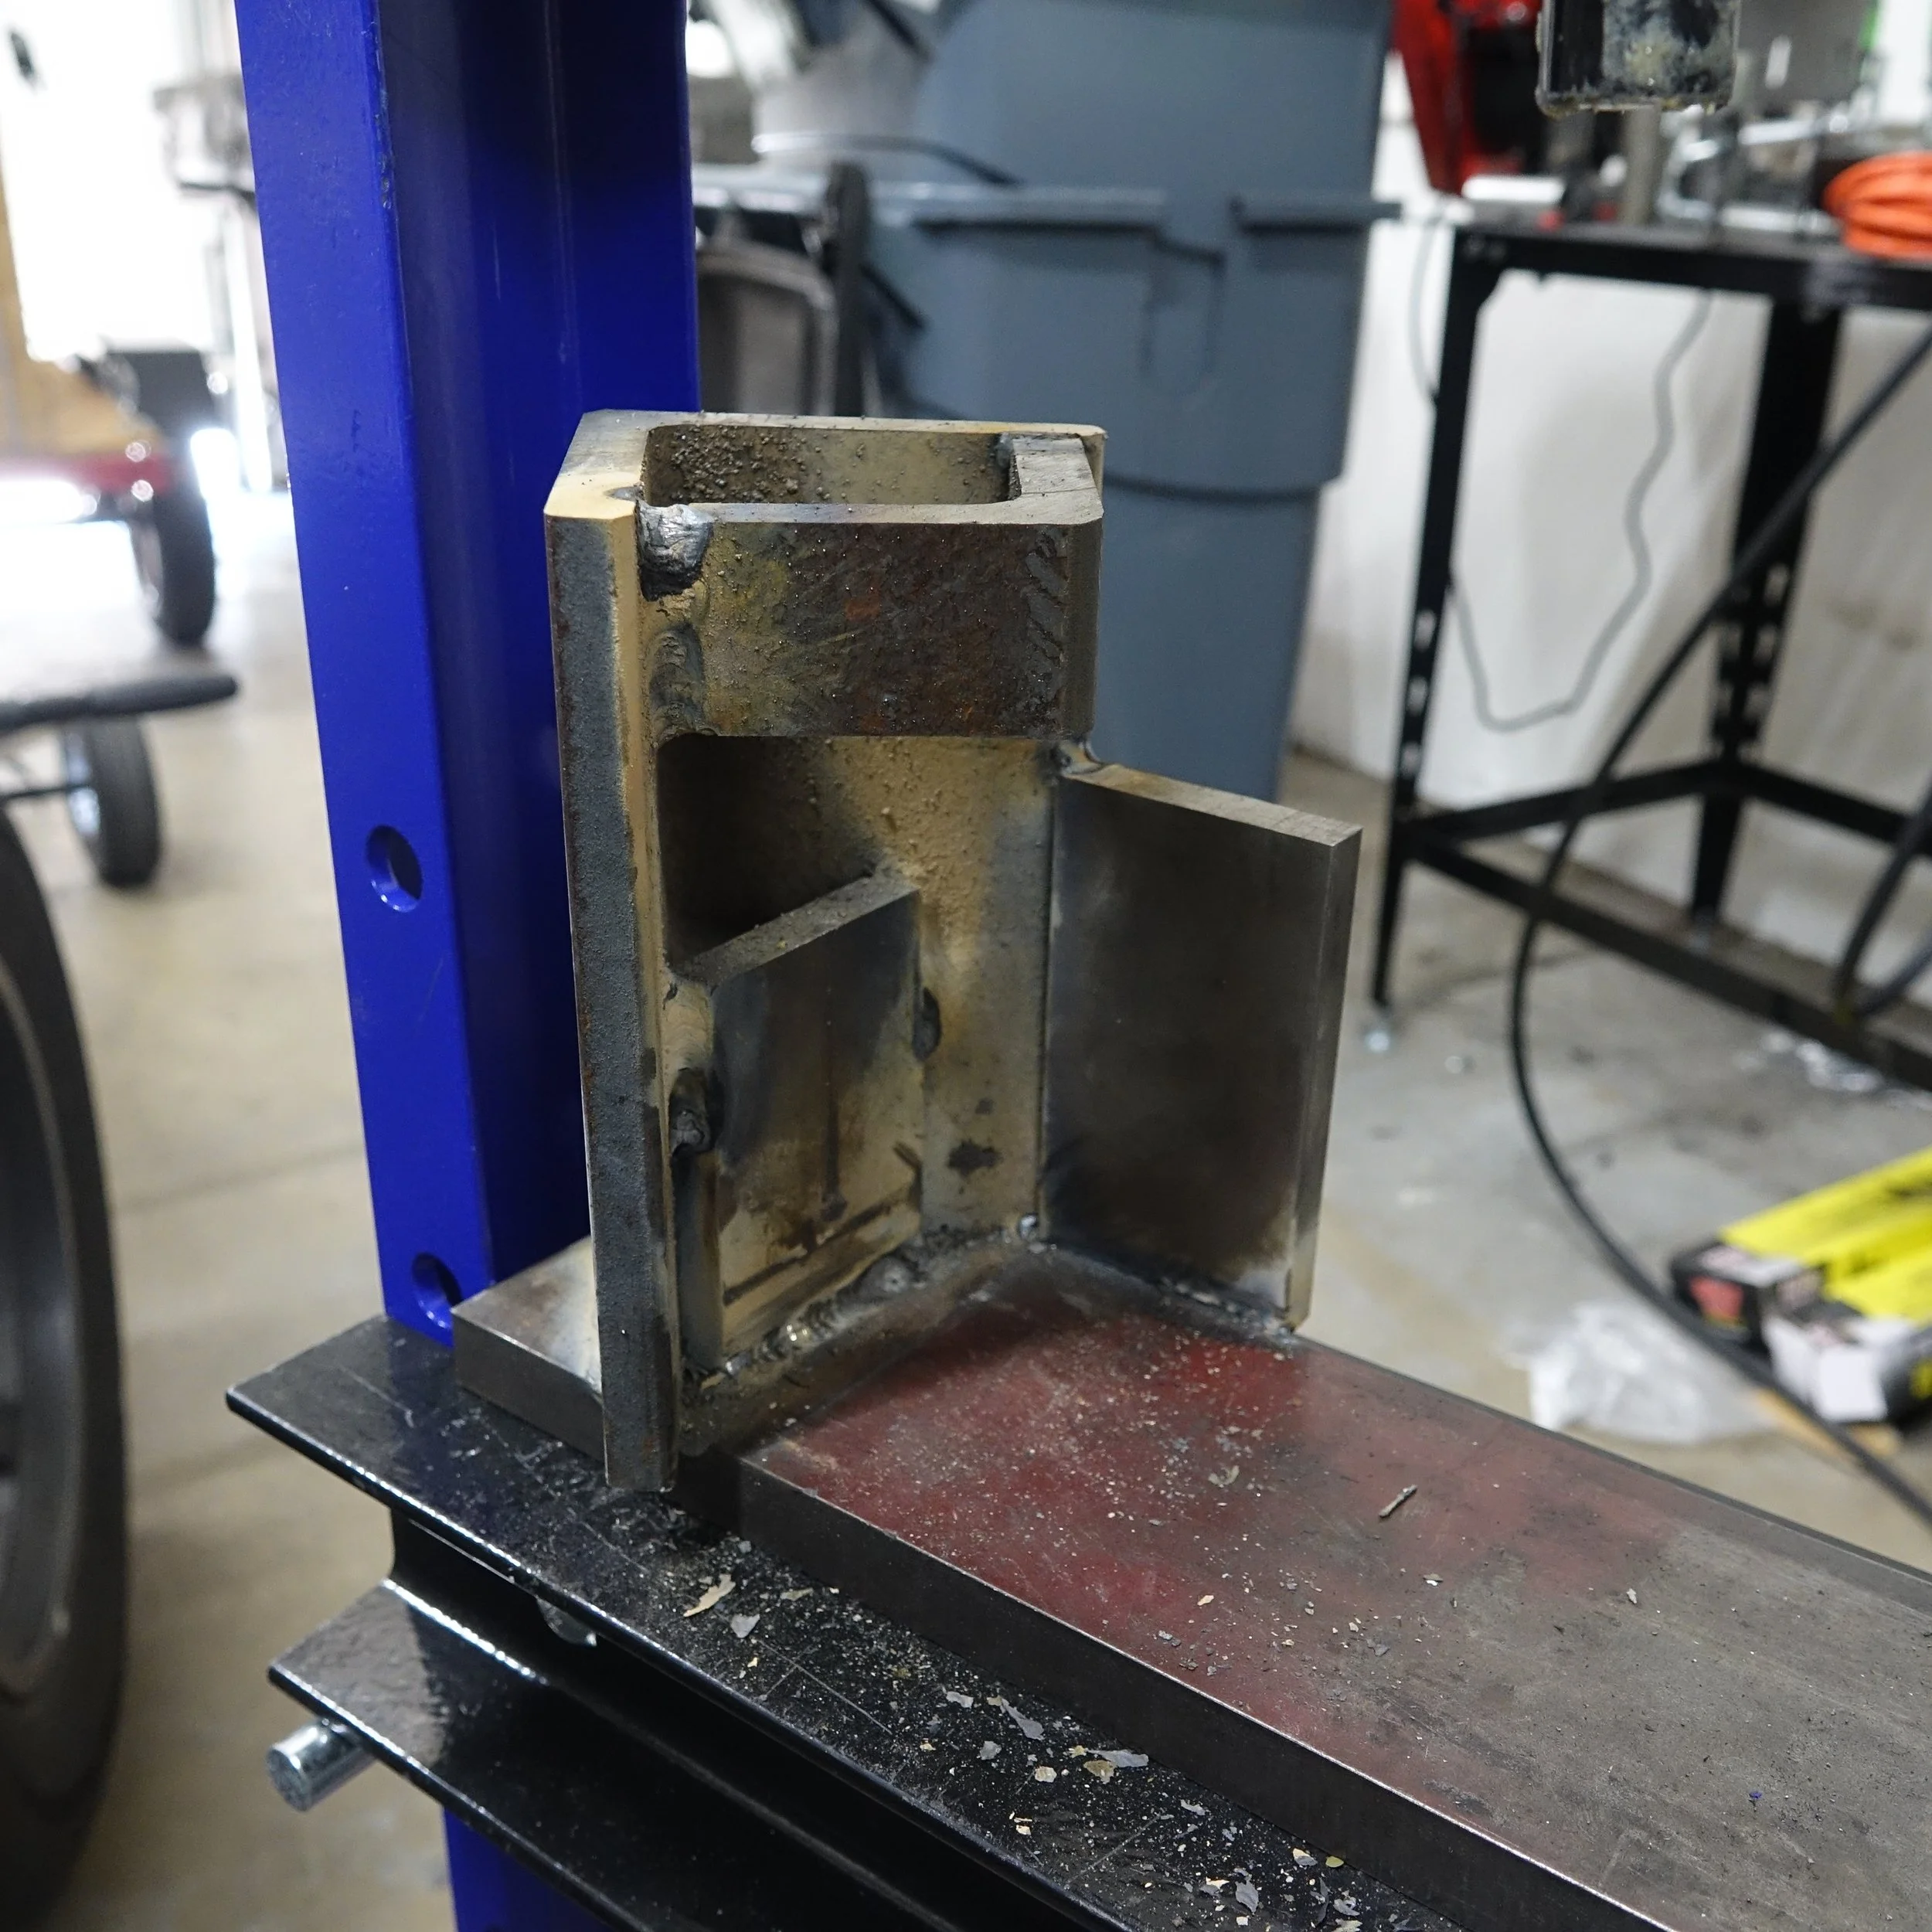
The next thing you need is the fixture. It needs to be easy to change out test coupons and strong enough to not be the weak link. In the picture above you can see how we did it. We got lucky and found this scrap at our local metal yard. Thick 1/2 inch angle and plate. It is built in such a way that the test pieces can load and unload easily through the top hoop. A plate at the base provides a jam spot when load is applied. We mounted that to a thick plate and added a gusset on the back side to reduce flex when we load the samples. Flux core welds to hold it together and your ready to go.
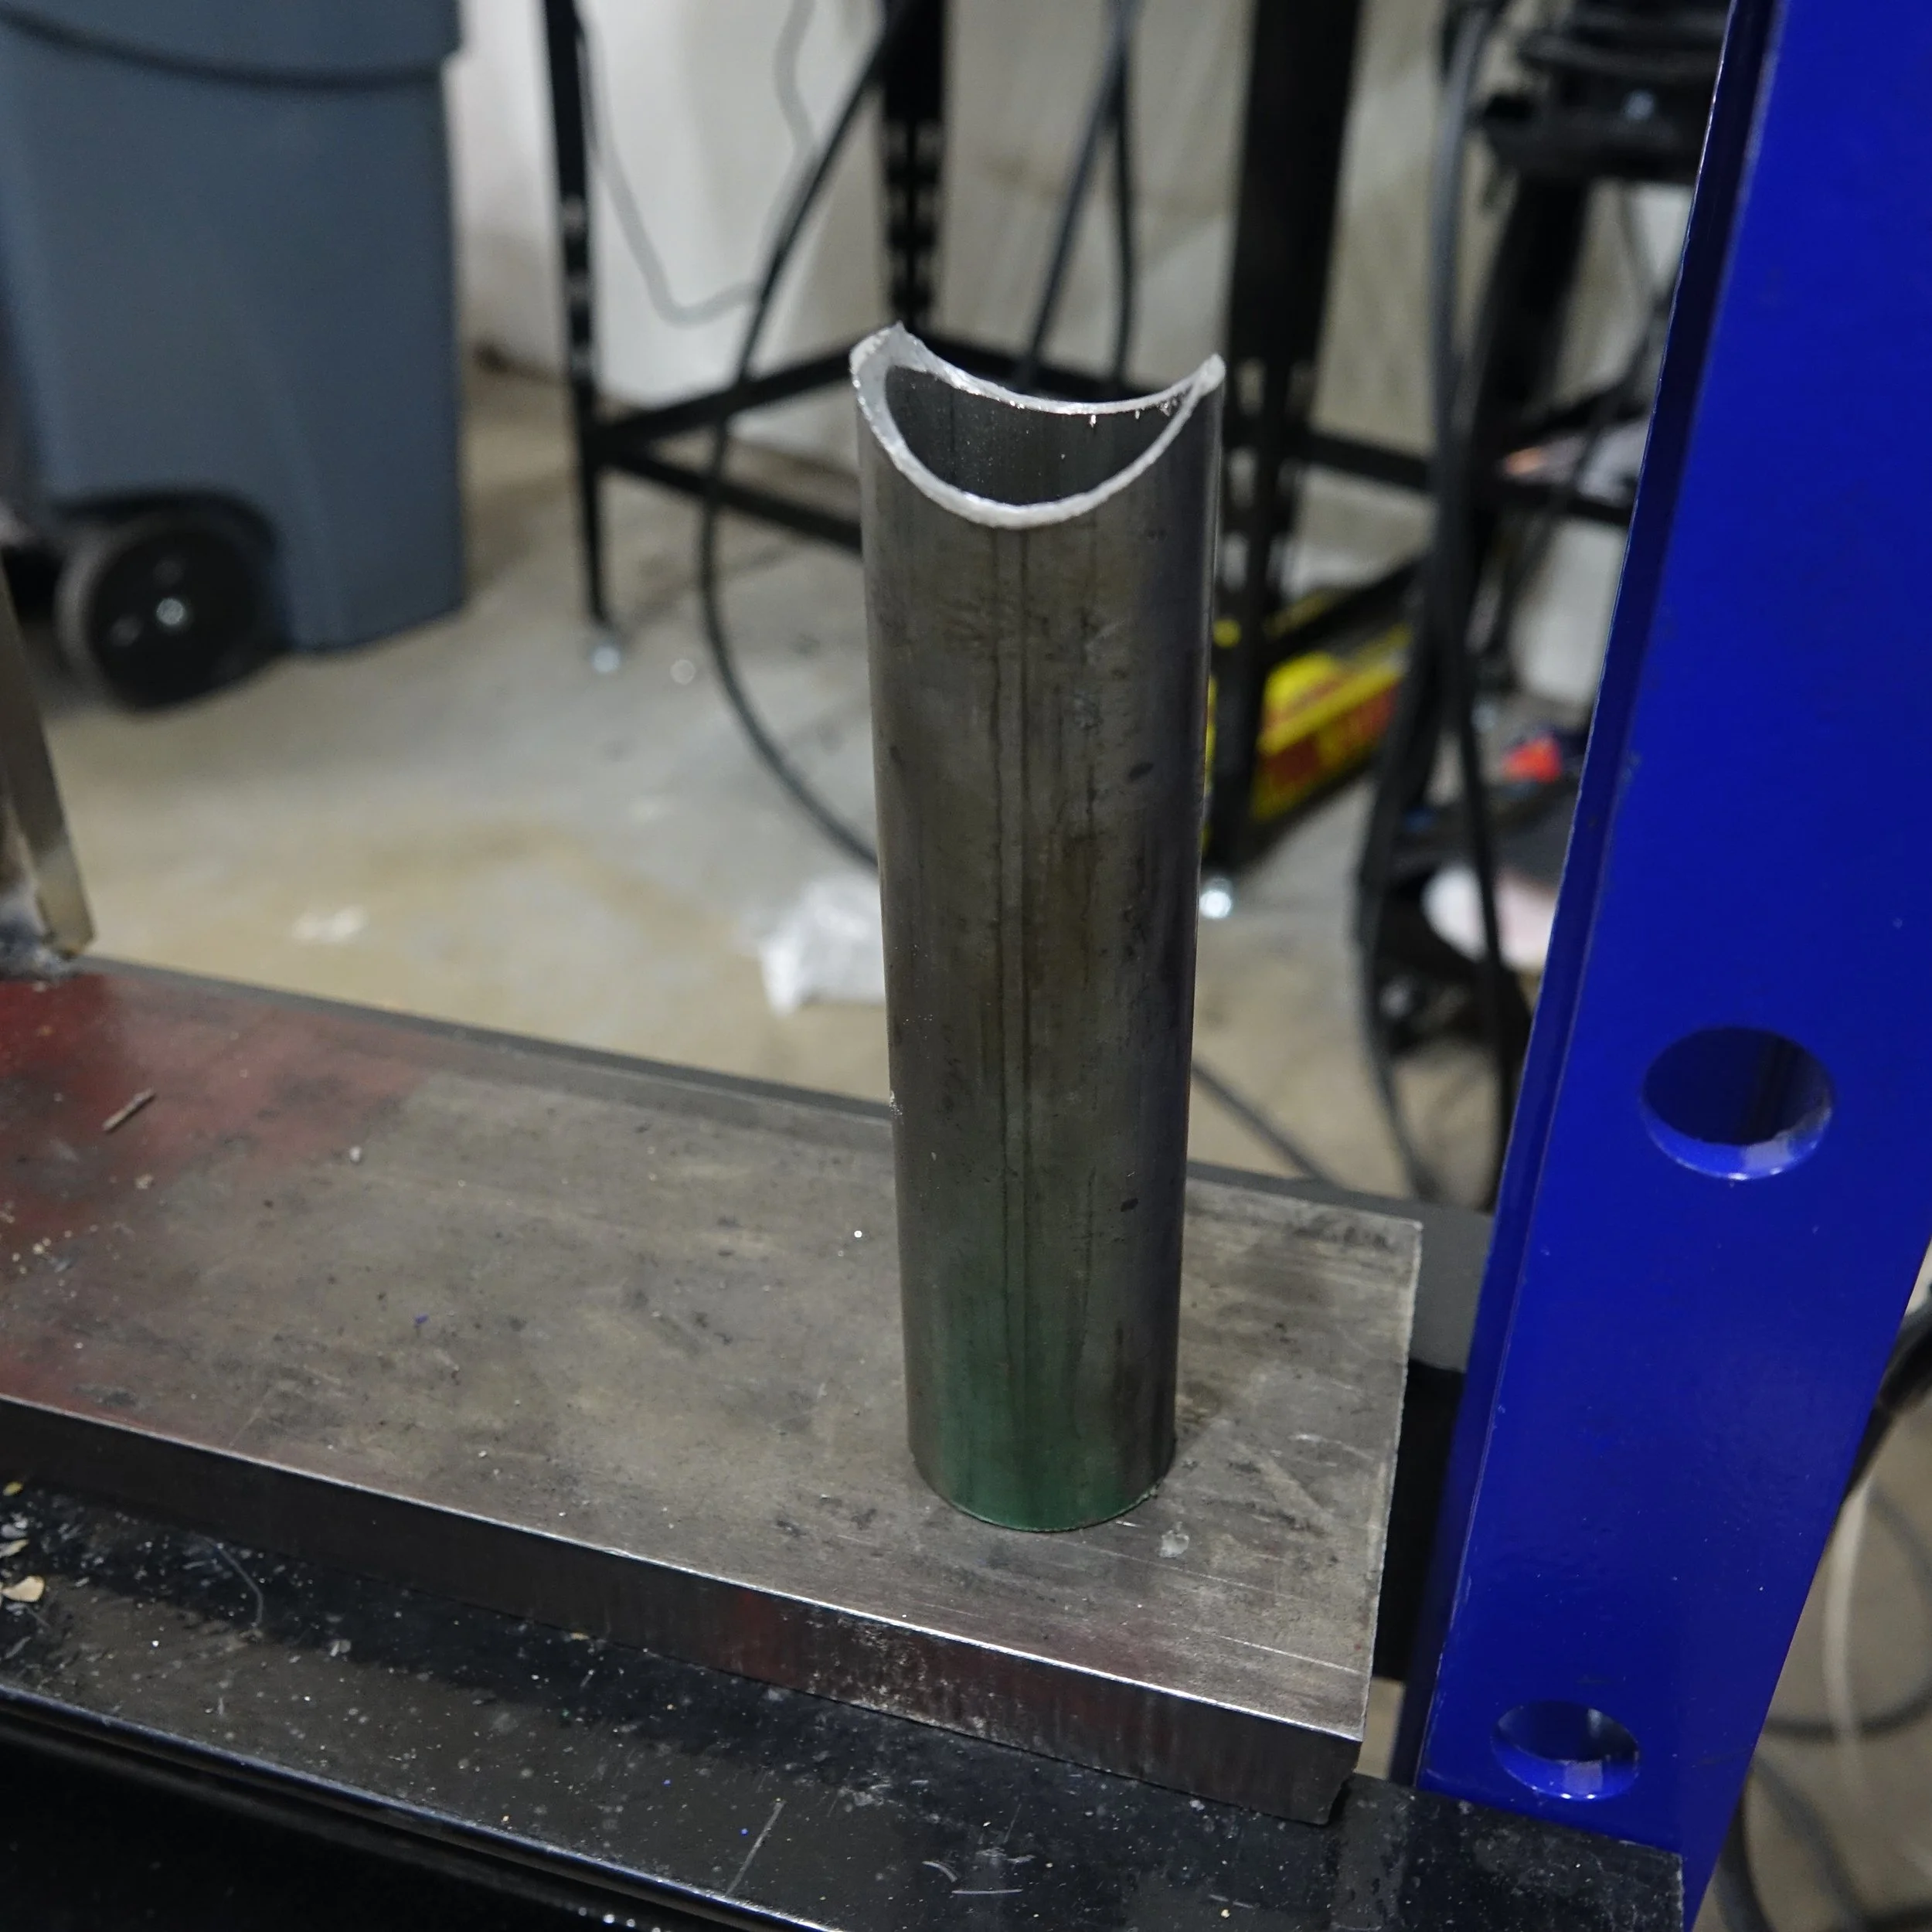
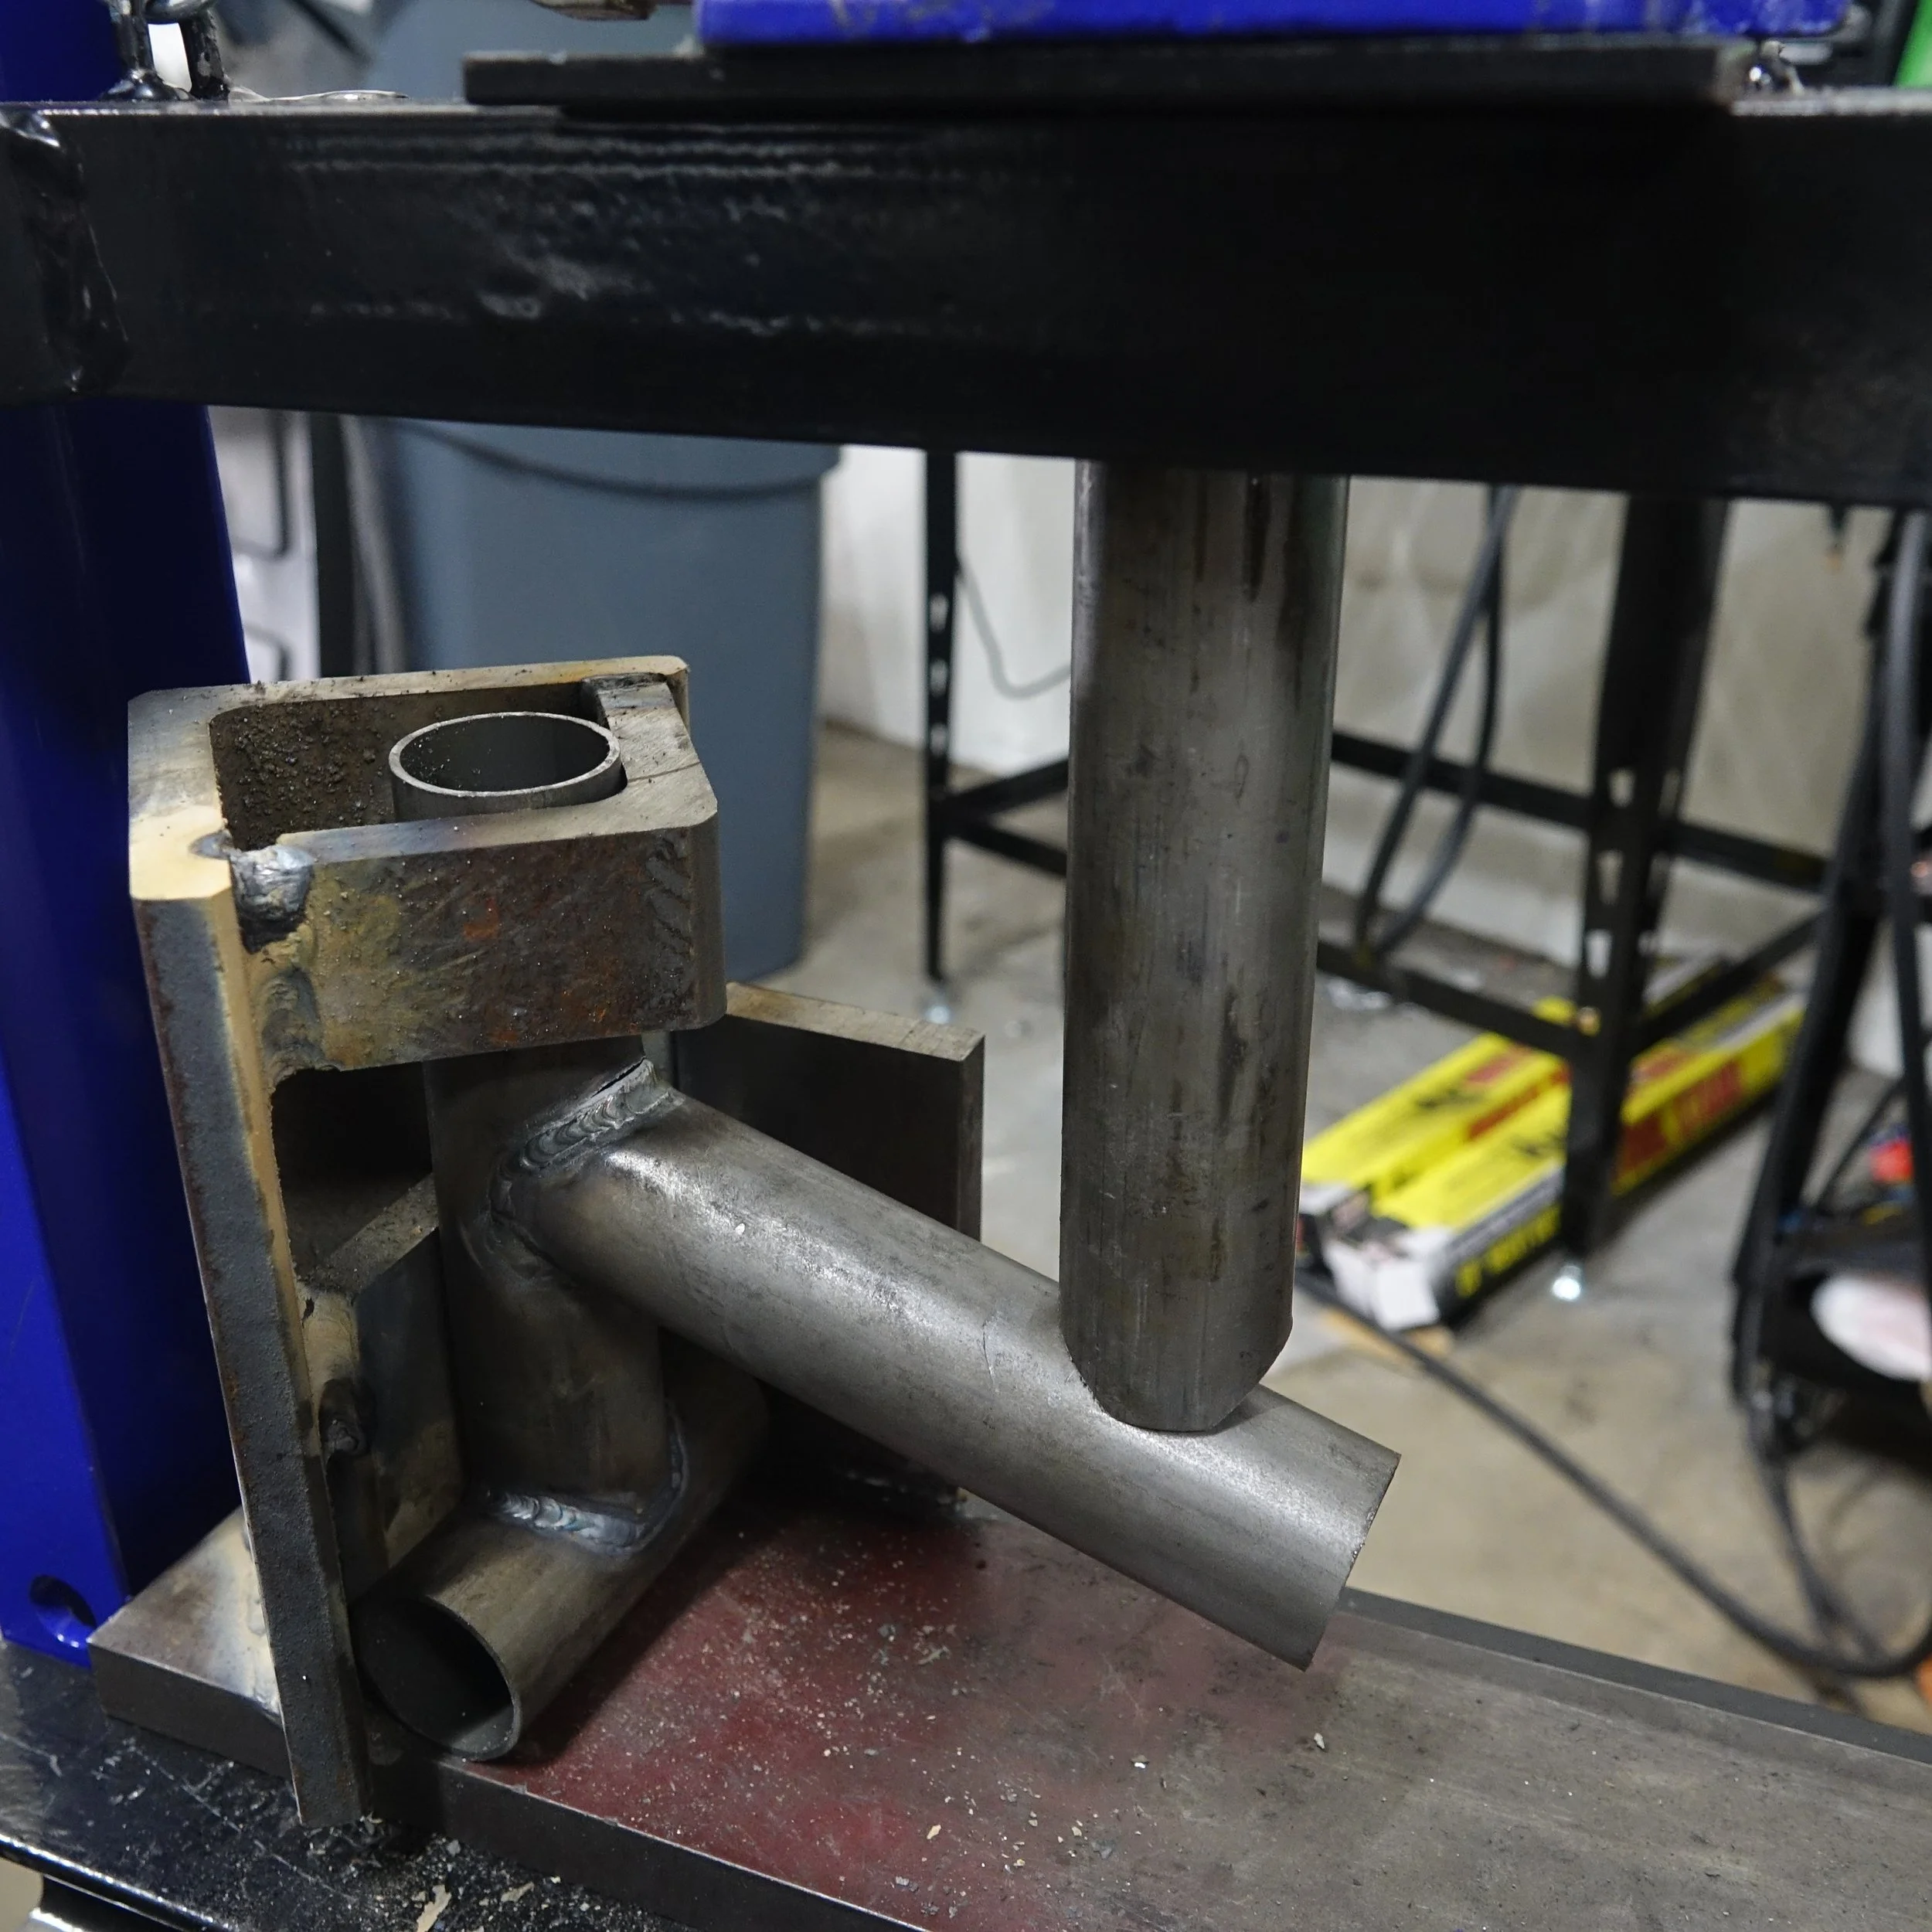
In the three pictures above you can see how the setup works when loaded. An extension was needed to reach the test piece. That extension needs to be very thick wall tubing to handle the loads. The first extension we used was too thin and just bent. .120 wall was used and it held up to 5 tons no issues.
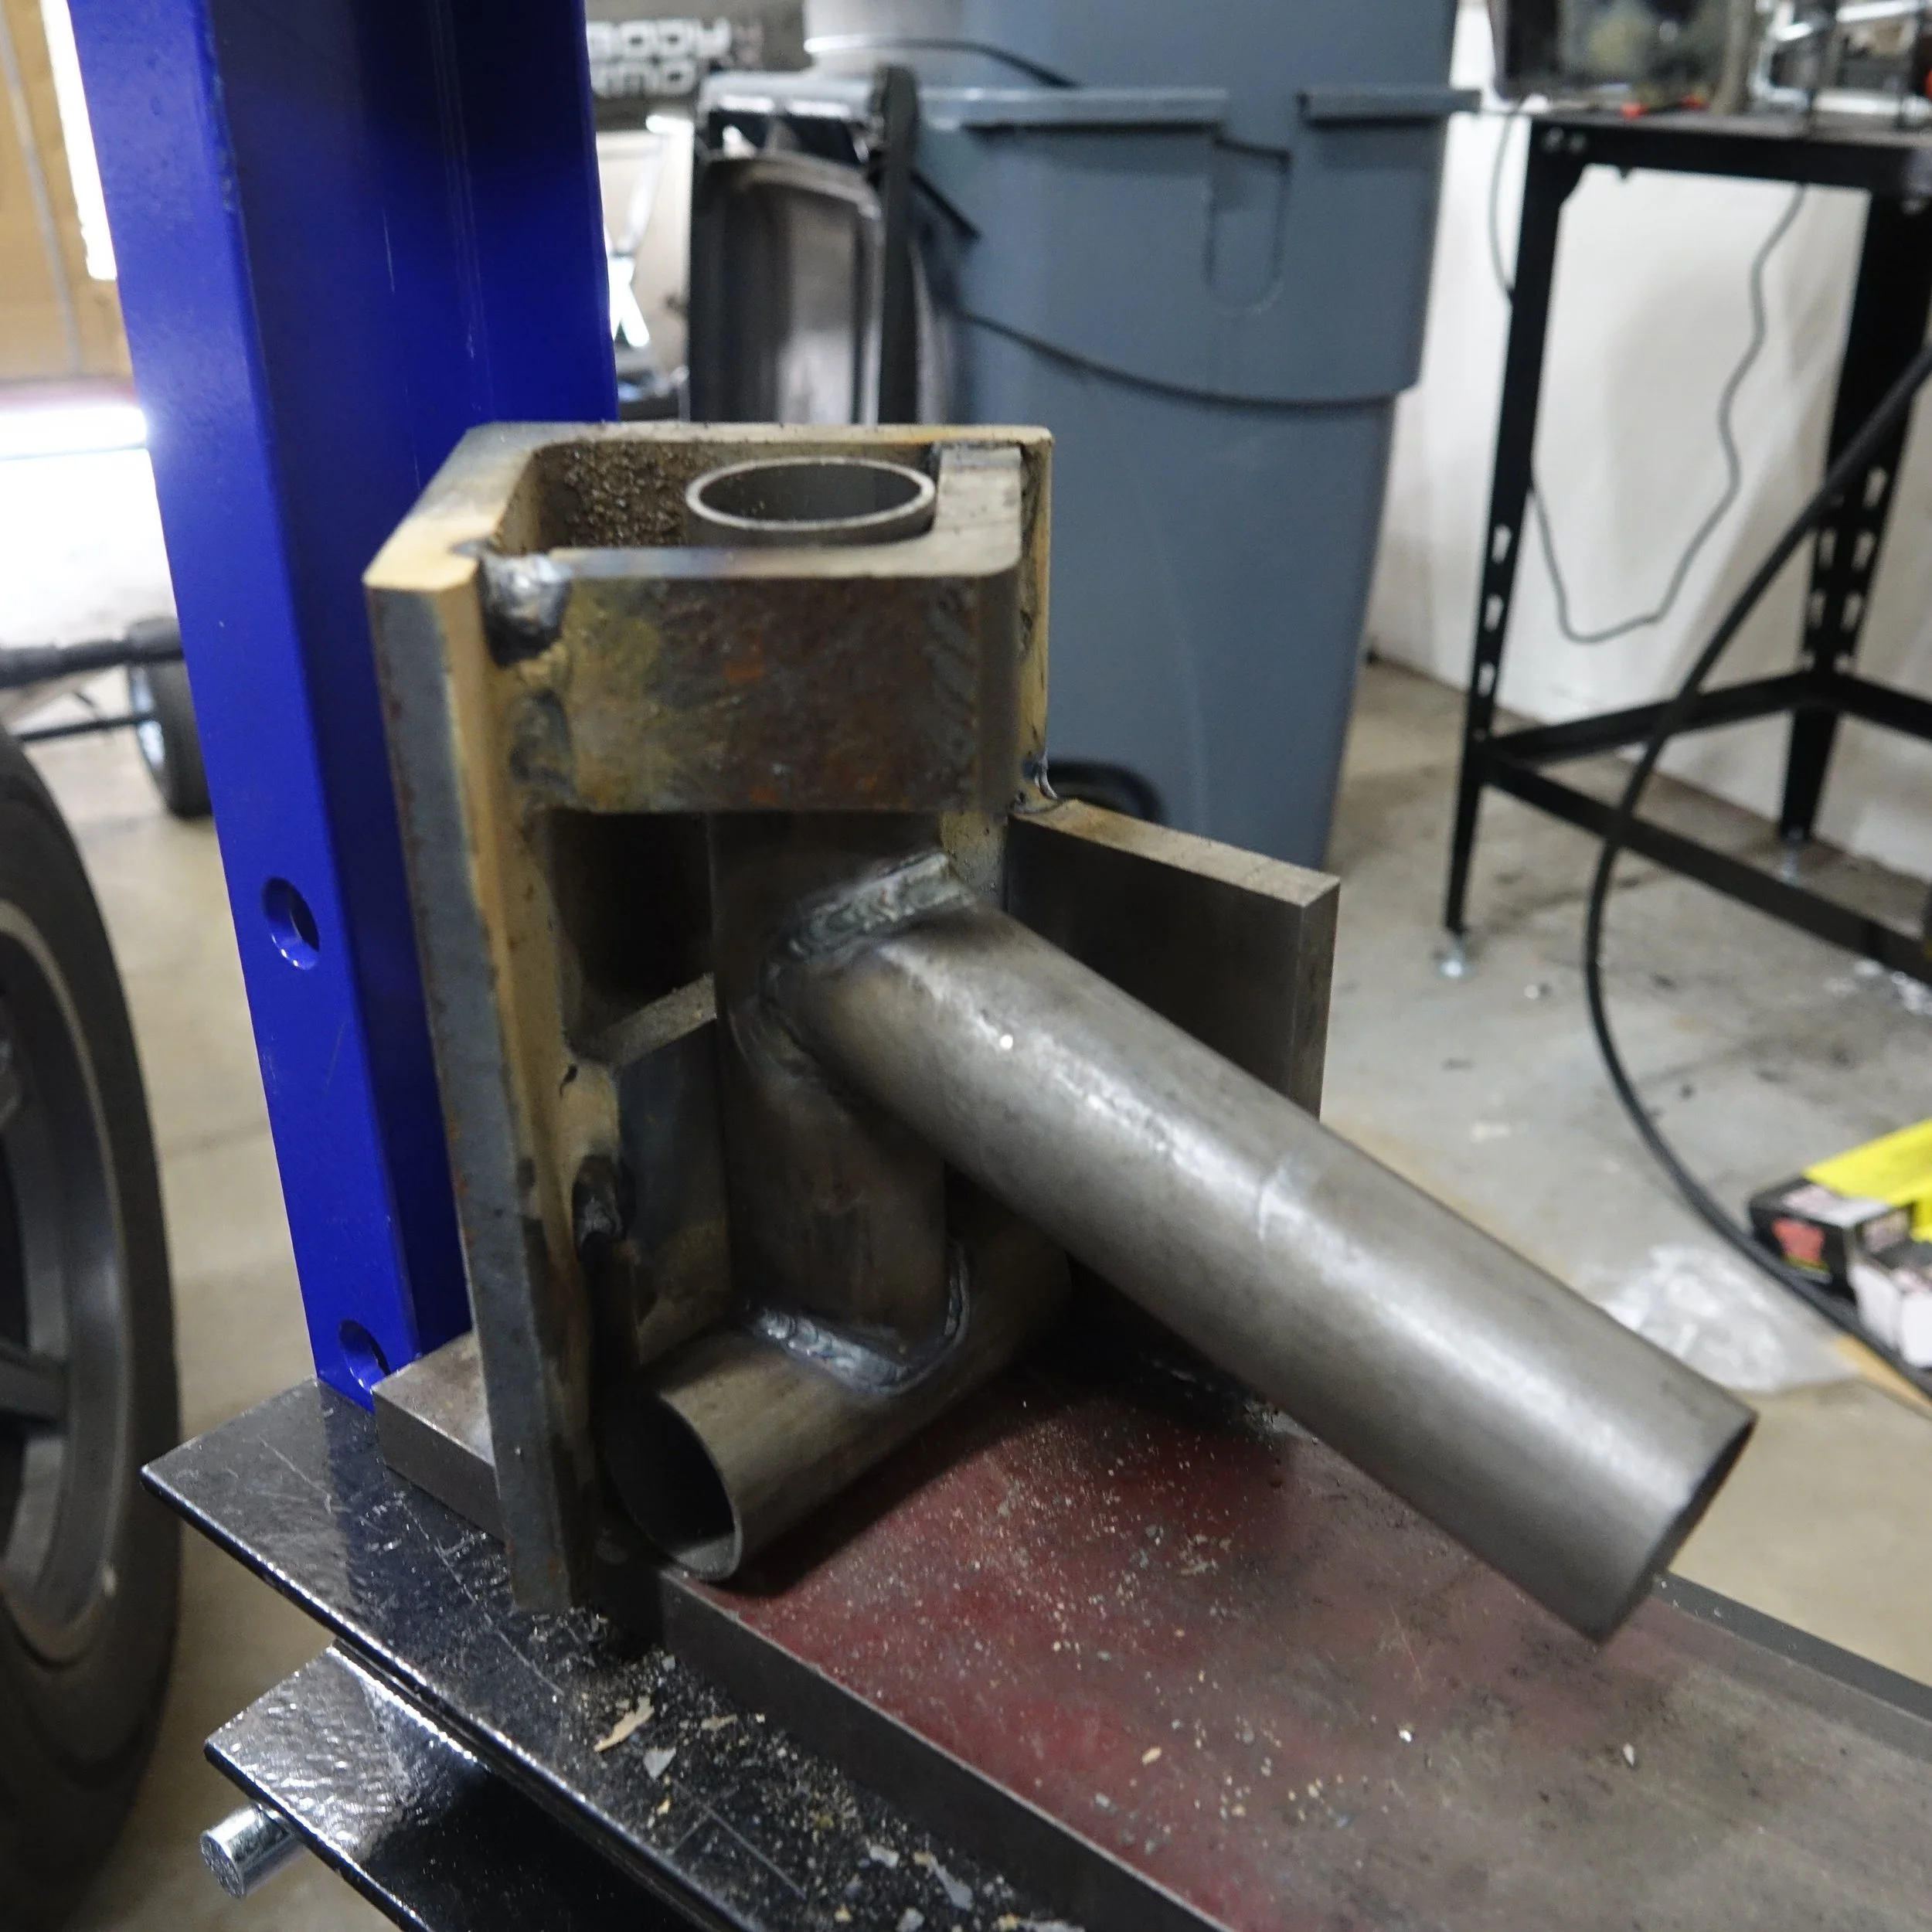
In the setup you can see we apply the load a good amount out from the weld. This is on purpose. We only have 12 tons to work with and adding leverage to the setup will reduce the force needed to brake the welds. We set our extension 3-4 inches out from the weld and that give us 2-3 times the leverage. You can imaging if the extension was very close to the weld how much force it would take to brake it. We saw 5 tons on this setup! And is a cheap and easy way to get a low force press to do the job.
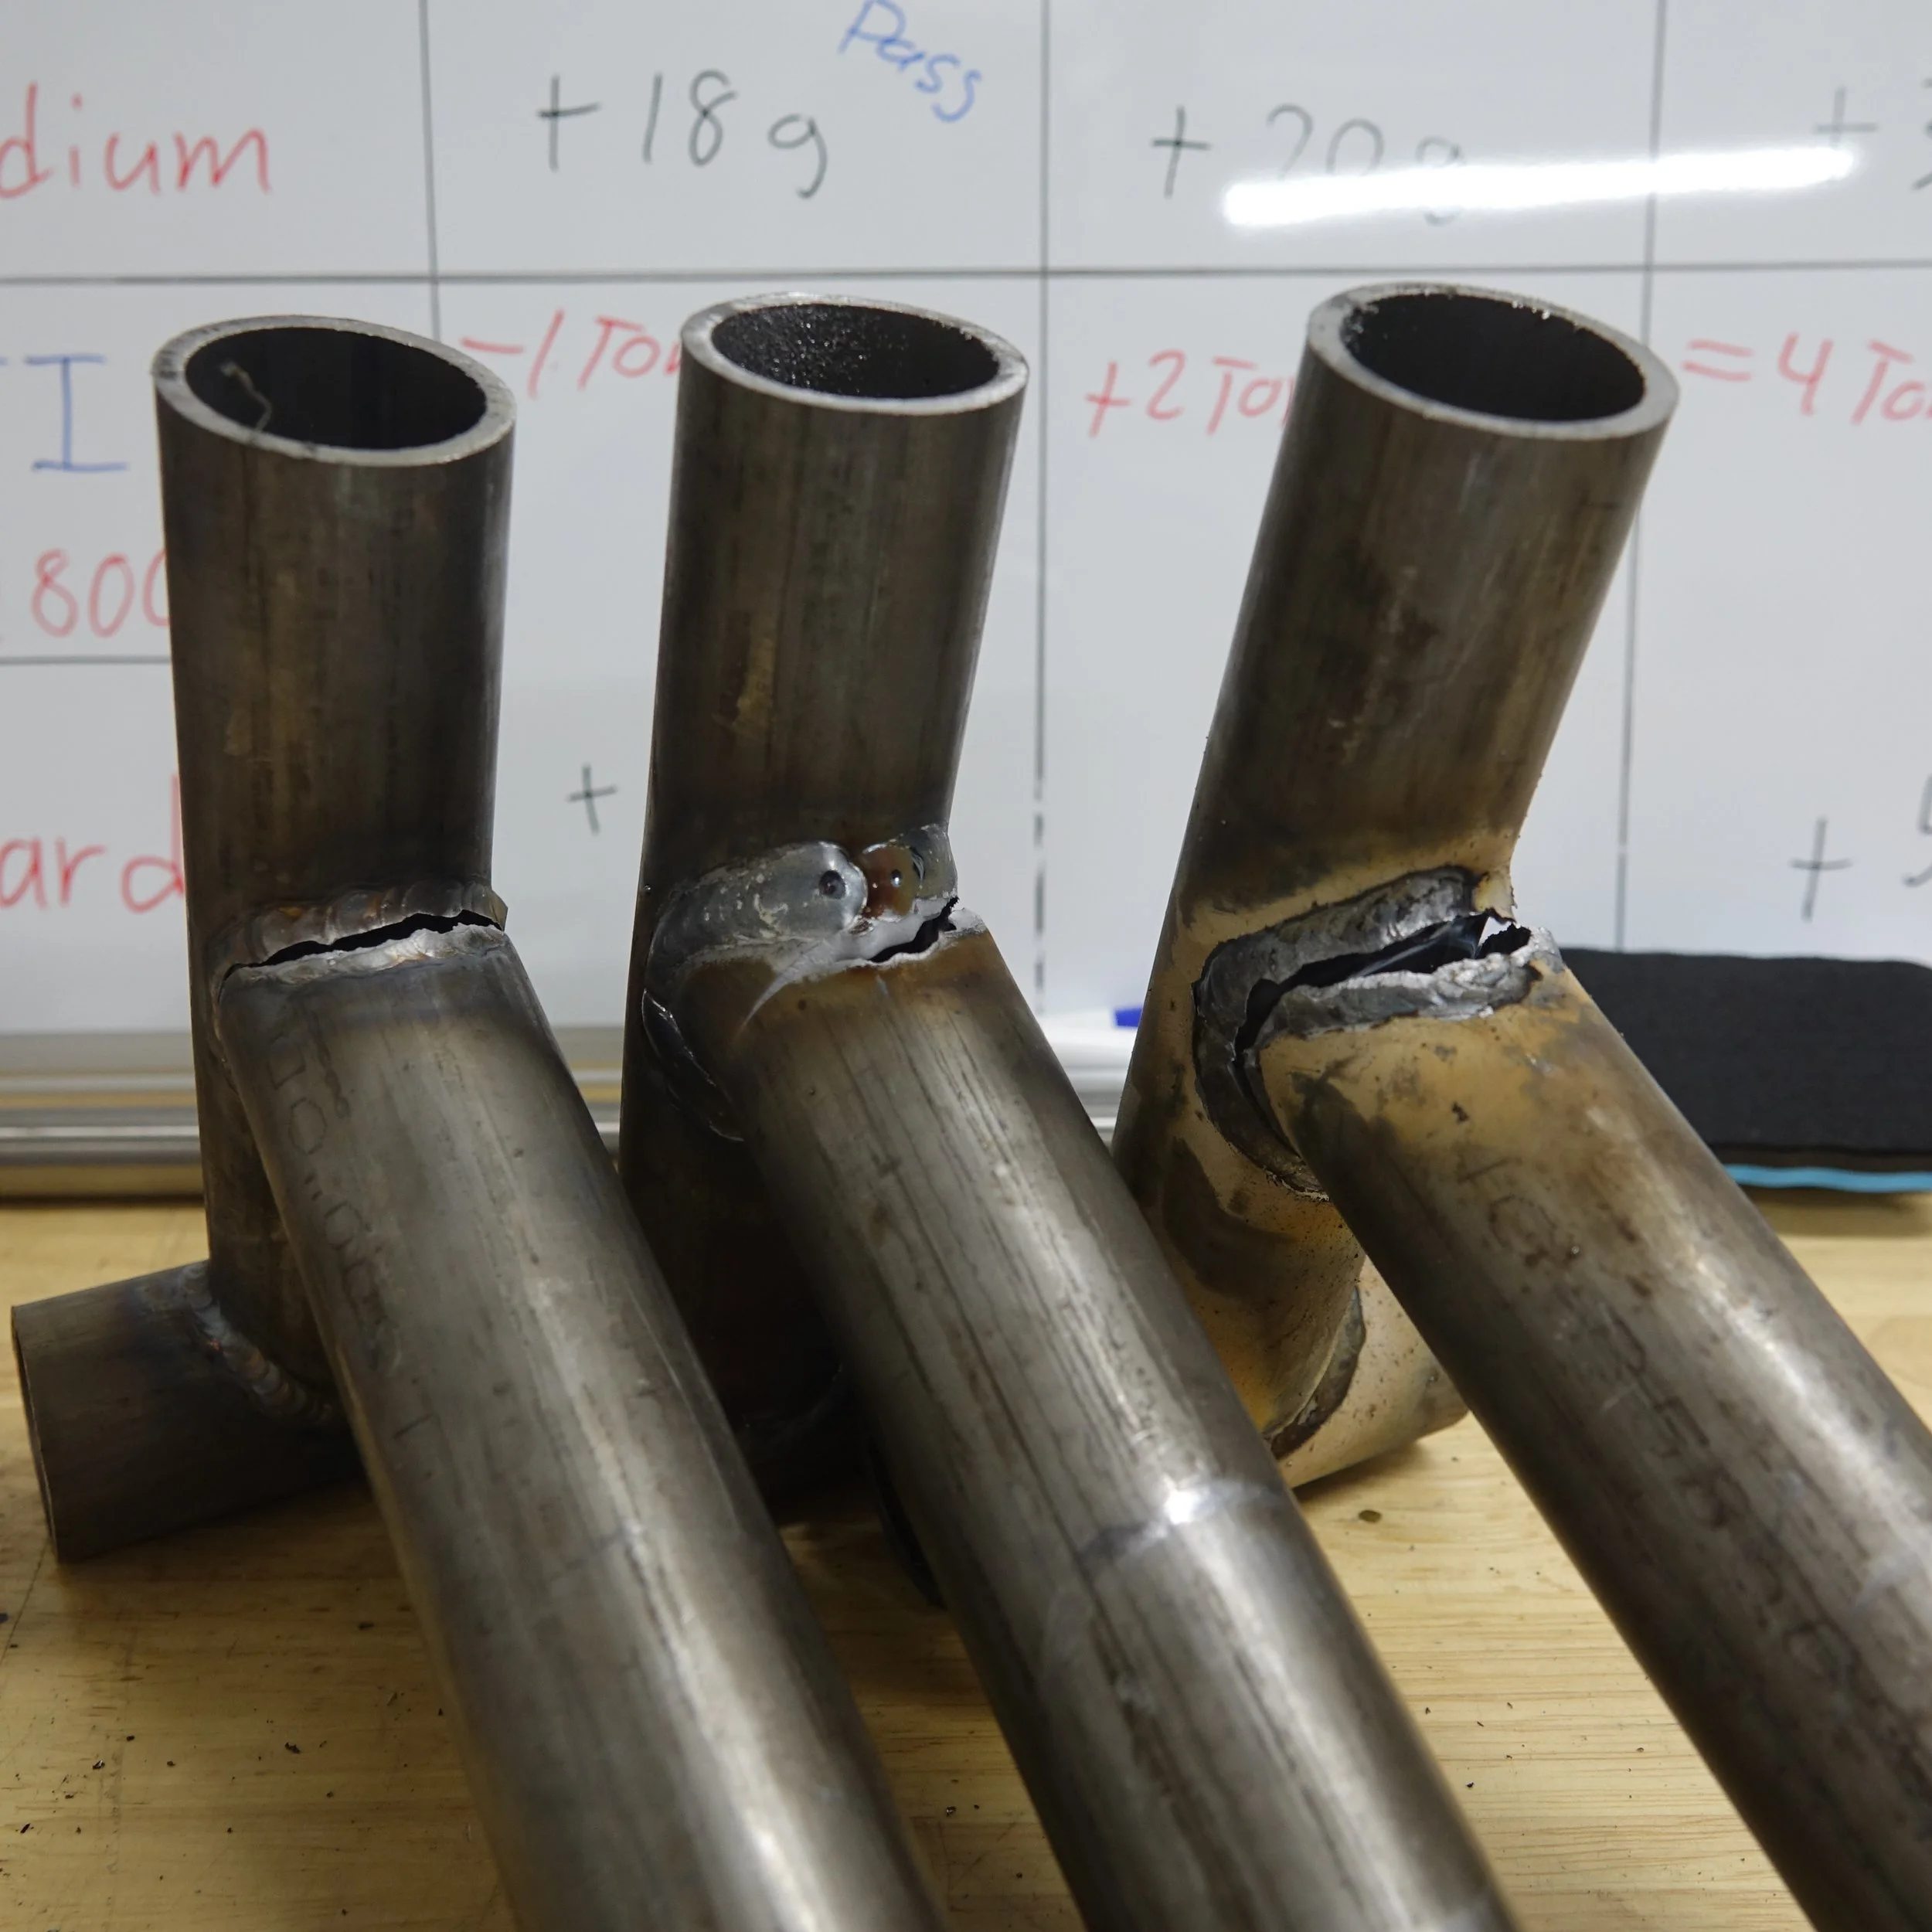
The samples are simple. 3-1/2” long tube for the base. A 6” vertical piece and a 6” horizontal piece. They are all centered and welded fully. You can adjust this shape to suit your needs. But we tried to come up with a test shape that was accurate to real life and required as little material as possible. We started with .035” wall mild steel tube and tested Flux core, MIG and TIG welding to see how each performed. We then decided to repeat the testing but on thicker tubes. .065” and .120” wall tubes where tested with interesting results.
We weighed the test samples before and after welding to measure how much filler material was added. And wrote that down on a white board. The test was a simple pass or fail. If the weld broke first that was a fail. Any good weld will out perform the base material. This means an ideal weld will hold while the base material around it fails. Lets see how our weld coupons did!
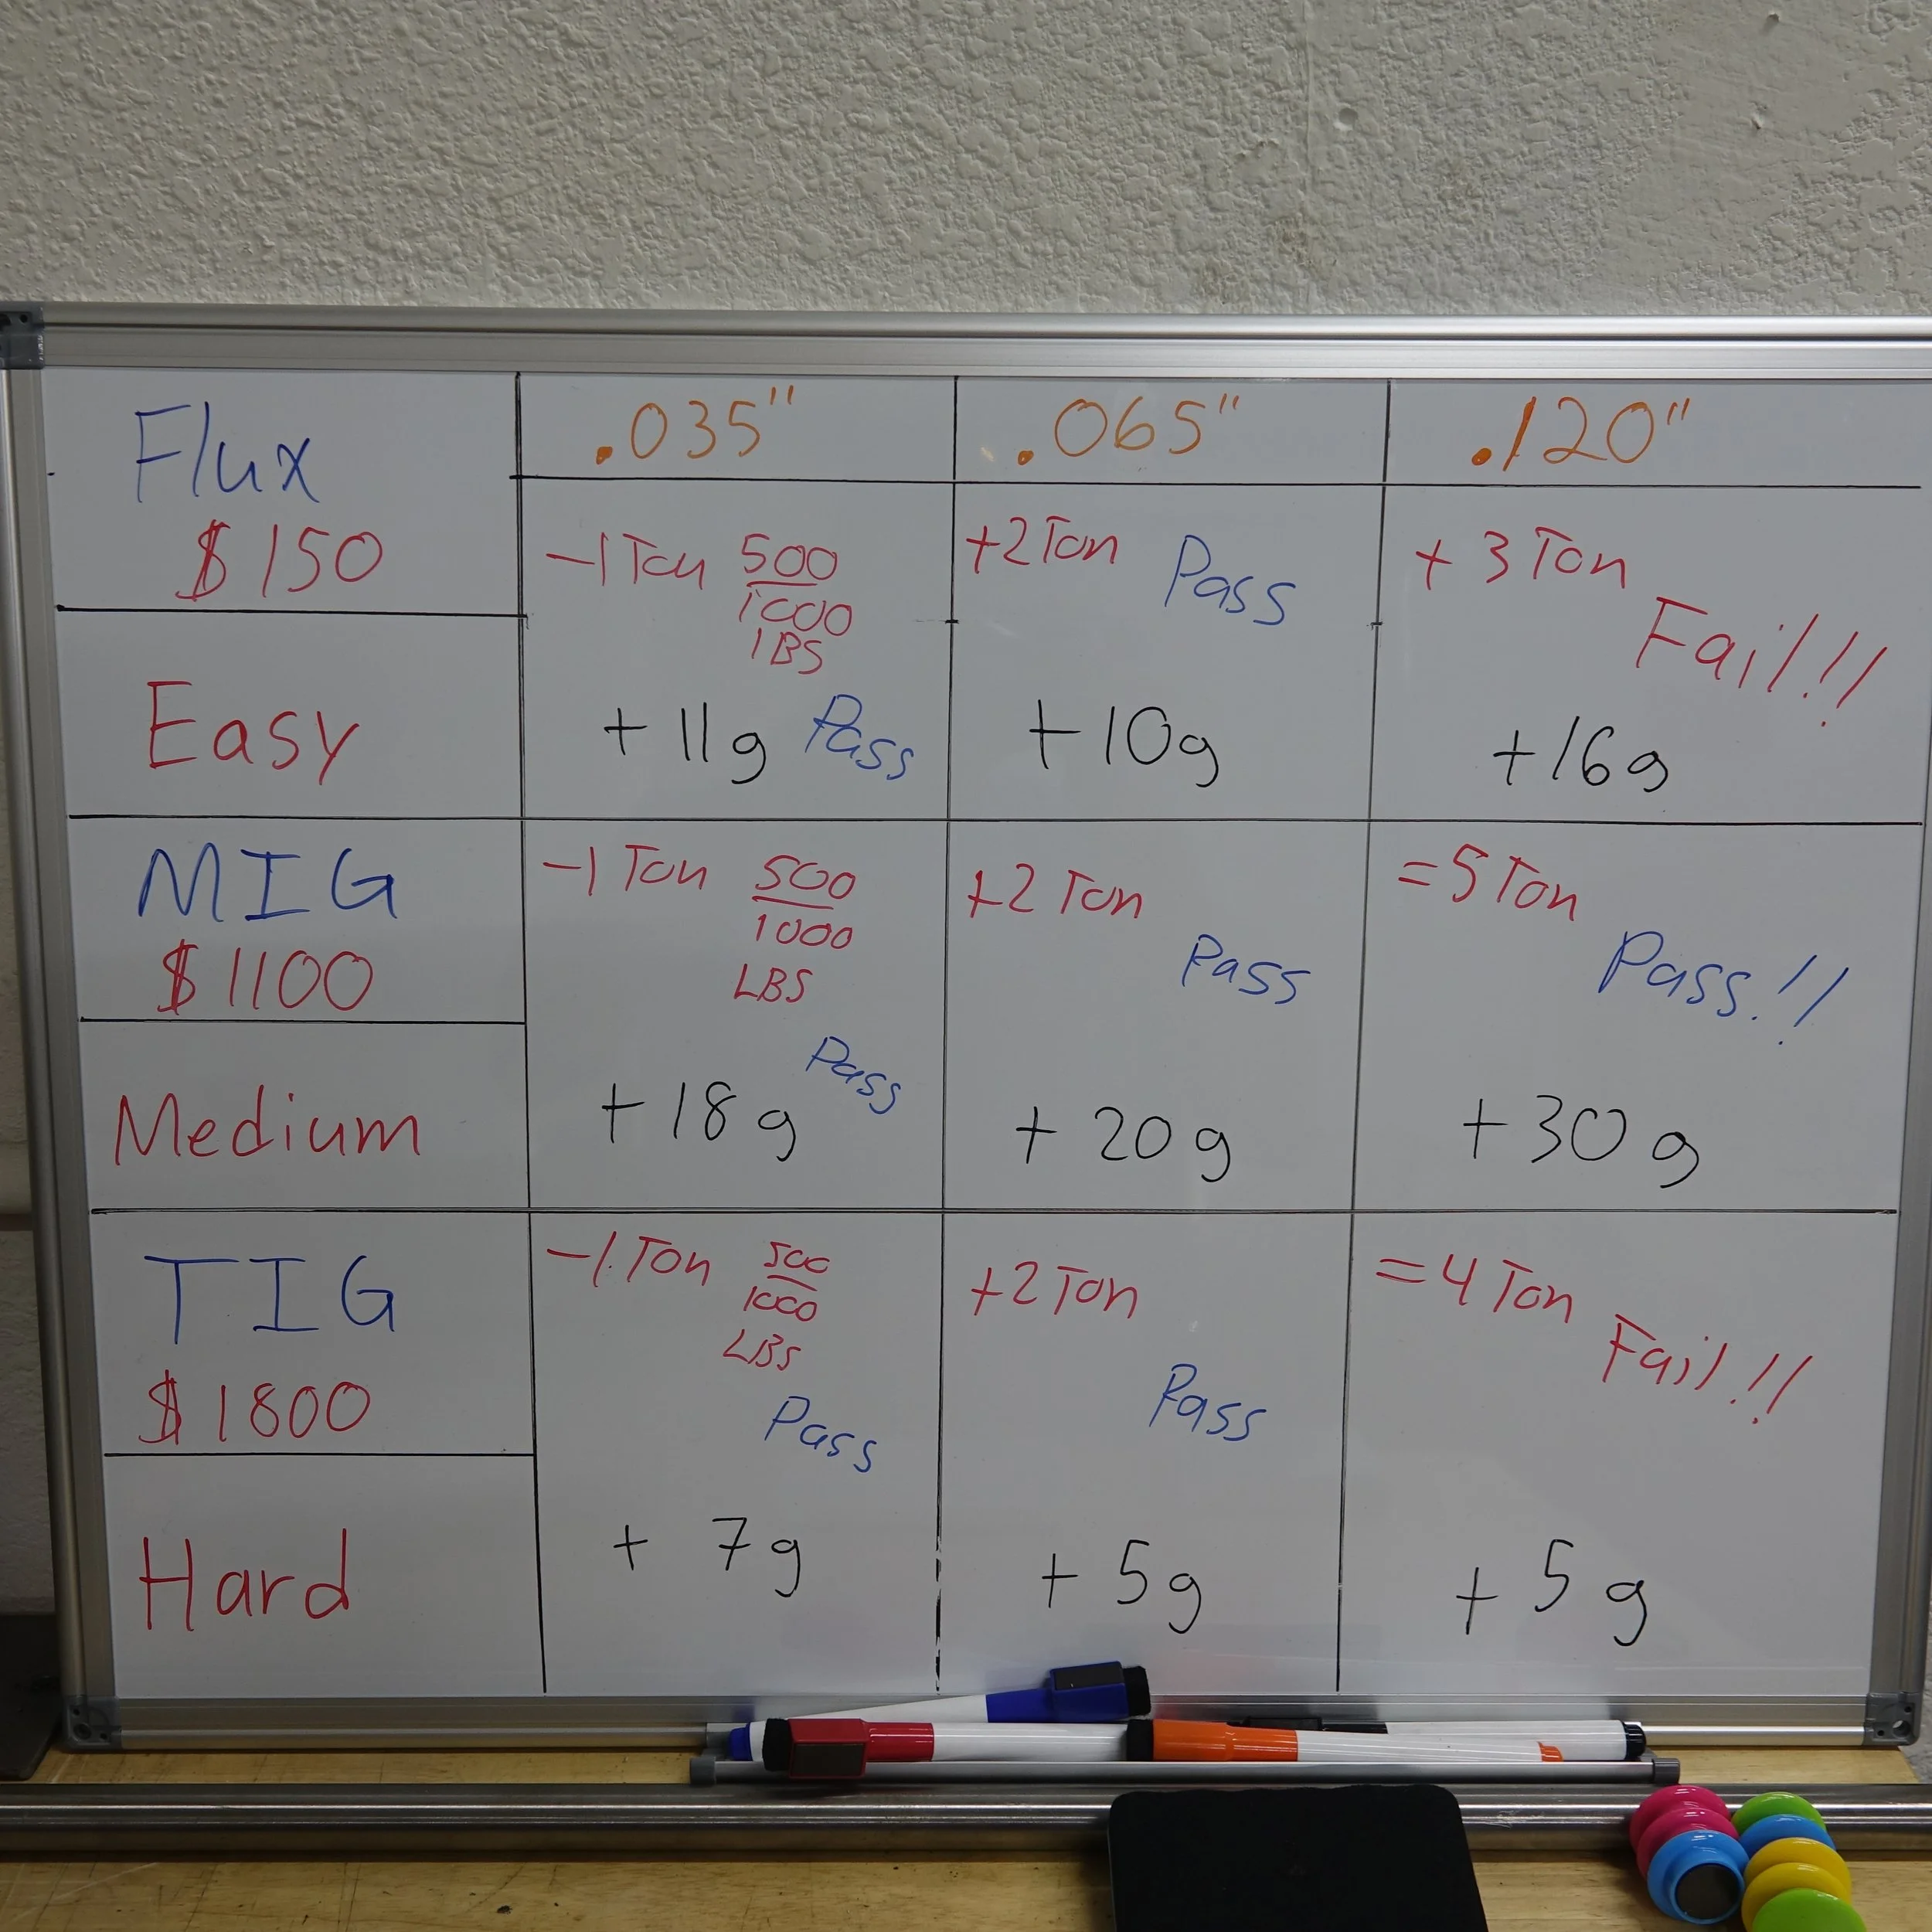
In the picture above you can see our test results. The welders have cost and difficulty metrics with them. Here is what I found. Flux core was unbelievably cheap. I got all the welders from Harbor Freight. And at $150 before weld wire, it was very clearly the most affordable option. But would it make good welds? During testing I found that it was easy to tune the Flux core to get good results and is why it’s an easy on the difficulty scale. The testing showed it was very capable. Flux core matched all other welds up until .120” wall tube! That’s fantastic!
The Mig welder did the best and I have a guess as to why. I have the most experience with Mig welding and have lots of intuition as to what settings to use and if the weld is good or not. The other two welders are much more new to me and I had a harder time telling if the weld was good and if the settings where correct. So it naturally did the best. Which brings us to the first conclusion.
An experienced welder is more important than what type of weld process you use. All welders do the same thing. They melt metal. As long as you melt the metal together and did it correctly then all the processes will give strong reliable results. As shown above. The failures we see on the thick walled tubes are almost certainly from not enough heat and penetration. Like I said all welders melt metal. Thick metal is more difficult to melt as the base metal absorbs more heat. I “the welder” did not do a good job of applying enough heat to fully fuse and fill the seam.
The next conclusion is obvious. I need to adjust my settings and try again. This is the true value of destruction testing at home. You learn fast and inexpensively what does and does not work. In this case I now have the power to adjust the machines to get good results and know that they are good results. Not just an educated guess. You can see that in the case of the .120” wall tubes you can get a swing of 1-2 tons lost strength. That’s massive! out of the 5 tons that the best sample did the other samples where 20-40% less strong.
Final conclusions. Tig clearly had the best strength to weight ratio and the Flux core clearly had the lowest cost. MIG lands in the middle. Good strength, more weight, and middle for cost. It takes a little extra to learn than the Flux because of gas coverage. But Tig was by far the most challenging process to learn and cost the most. Next testing will be better weld prep and adjusted settings given the data we now have.
Wow! What a valuable asset to have in your garage! More testing is coming soon. Leave a comment below if you want some specific testing done.